Let’s just begin the story with a sad tale.
A very sad little chair.
So I found this chair at a yard sale. It was a sad sack of a chair. It just sat there in the grass..the furthest from the sale. Like they were going to carry it to the trash…and just got too lazy. Thought…ehhhh….just leave it here…maybe someone wants it.
Well my friends. I live for shit like this.
My houses are all rescues, my furniture, all rescued. All my pets…you guessed it …rescued.
I just have a soft spot for a sad sack. You should have seen my house when I got it…the saddest sack house on the street! Pitiful.
So I see this pitiful chair. Asked the price. They looked oddly at me, shrugged ……and said $2??? Ok. I took pity. I gave them the $2. All the while thinking….I should have offered $1. I ended up buying other things that day….awesome jars for kitchen storage and a really cool orange art glass piece from the 70’s.For those items I asked for a better price and got it, but that’s a different story…..this story is the chair.
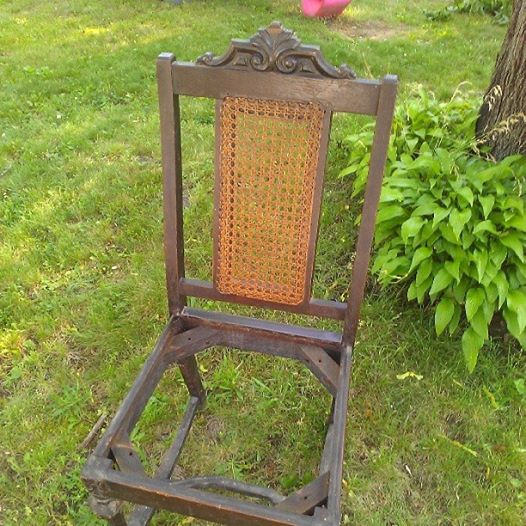
So Sad
So Luckily I was driving the BIG car that day…so I just shoved that chair in the back. Where it lived for a month. I wasn’t that I didn’t want to get to it…but those that know what the weather has been like lately understand my delay. Raining every damn day. ALmost.
So Finally I got around to the sad chair.
Here’s what I did. In case you have a sad chair or two that could use a similar treatment.
1. Clean that thing like nobodies business !!! This chair had clearly been in a moldy basement. And there were spider webs like CRAZY!!!
2. I tightened the feet..they had been replaced at some point and were loose. It was easy…just turned them to tighten..but often times I have to reglue this kind of stuff…..in which case it just takes some wood glue and patience. Luckily the caned back is in good shape…cause I can’t fix caning. I usually add batting (stuffing) and cover it with fabric. But in this case the caning is one of the things I really liked about this chair, so it stays.
3. Take off the seat….chairs like this usually are held in place by a couple of screws on the underside. A basic screwdriver usually does the trick.I also recovered the seat. More on seat recover later.
Spoilers!
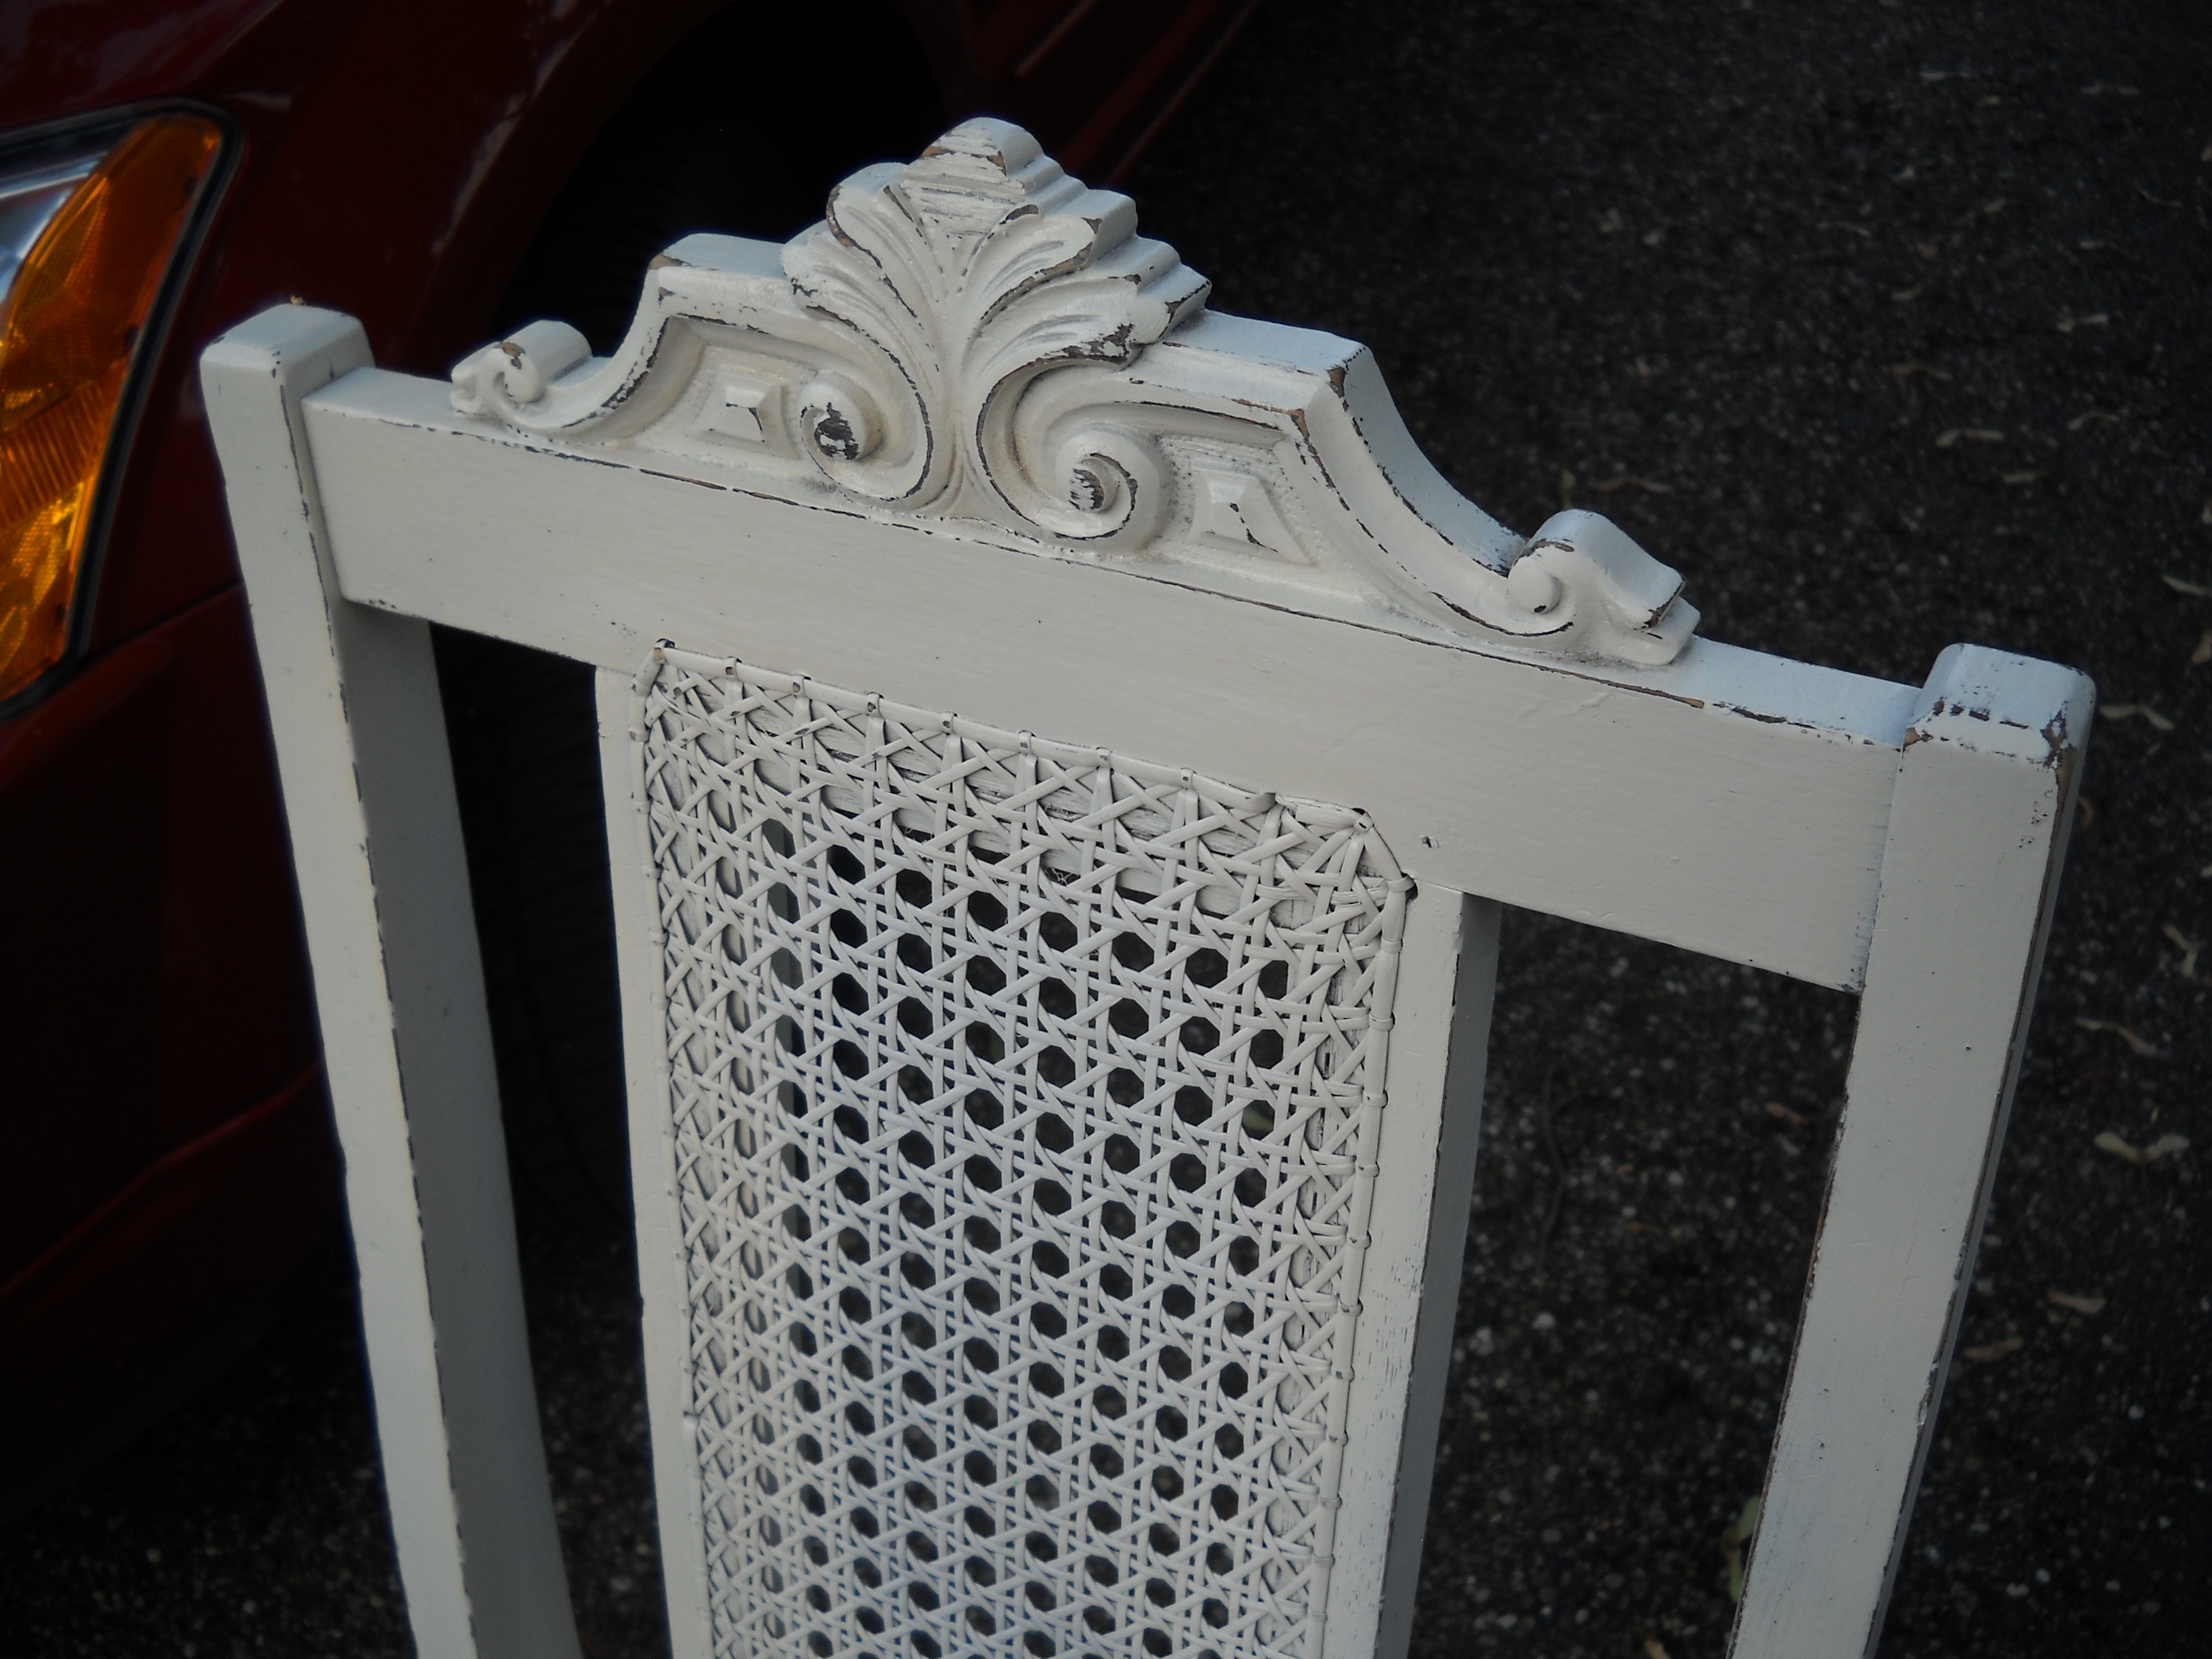
4. SPRAY PAINT!!! A fresh coat of off white paint. MY fav shade of off white is Rustoleum 2x in Blossum white. It covers well, is cheap and easy to find. Sometimes it leaves an almost sandy texture…I have no idea why…but I just give it a quick sanding. Done and done.
Already the chair looks about a thousand times better. I swear I could hear it sigh in relief.

My current fav spray paint….and my beloved spray paint handle….I love it so.
“sigh”
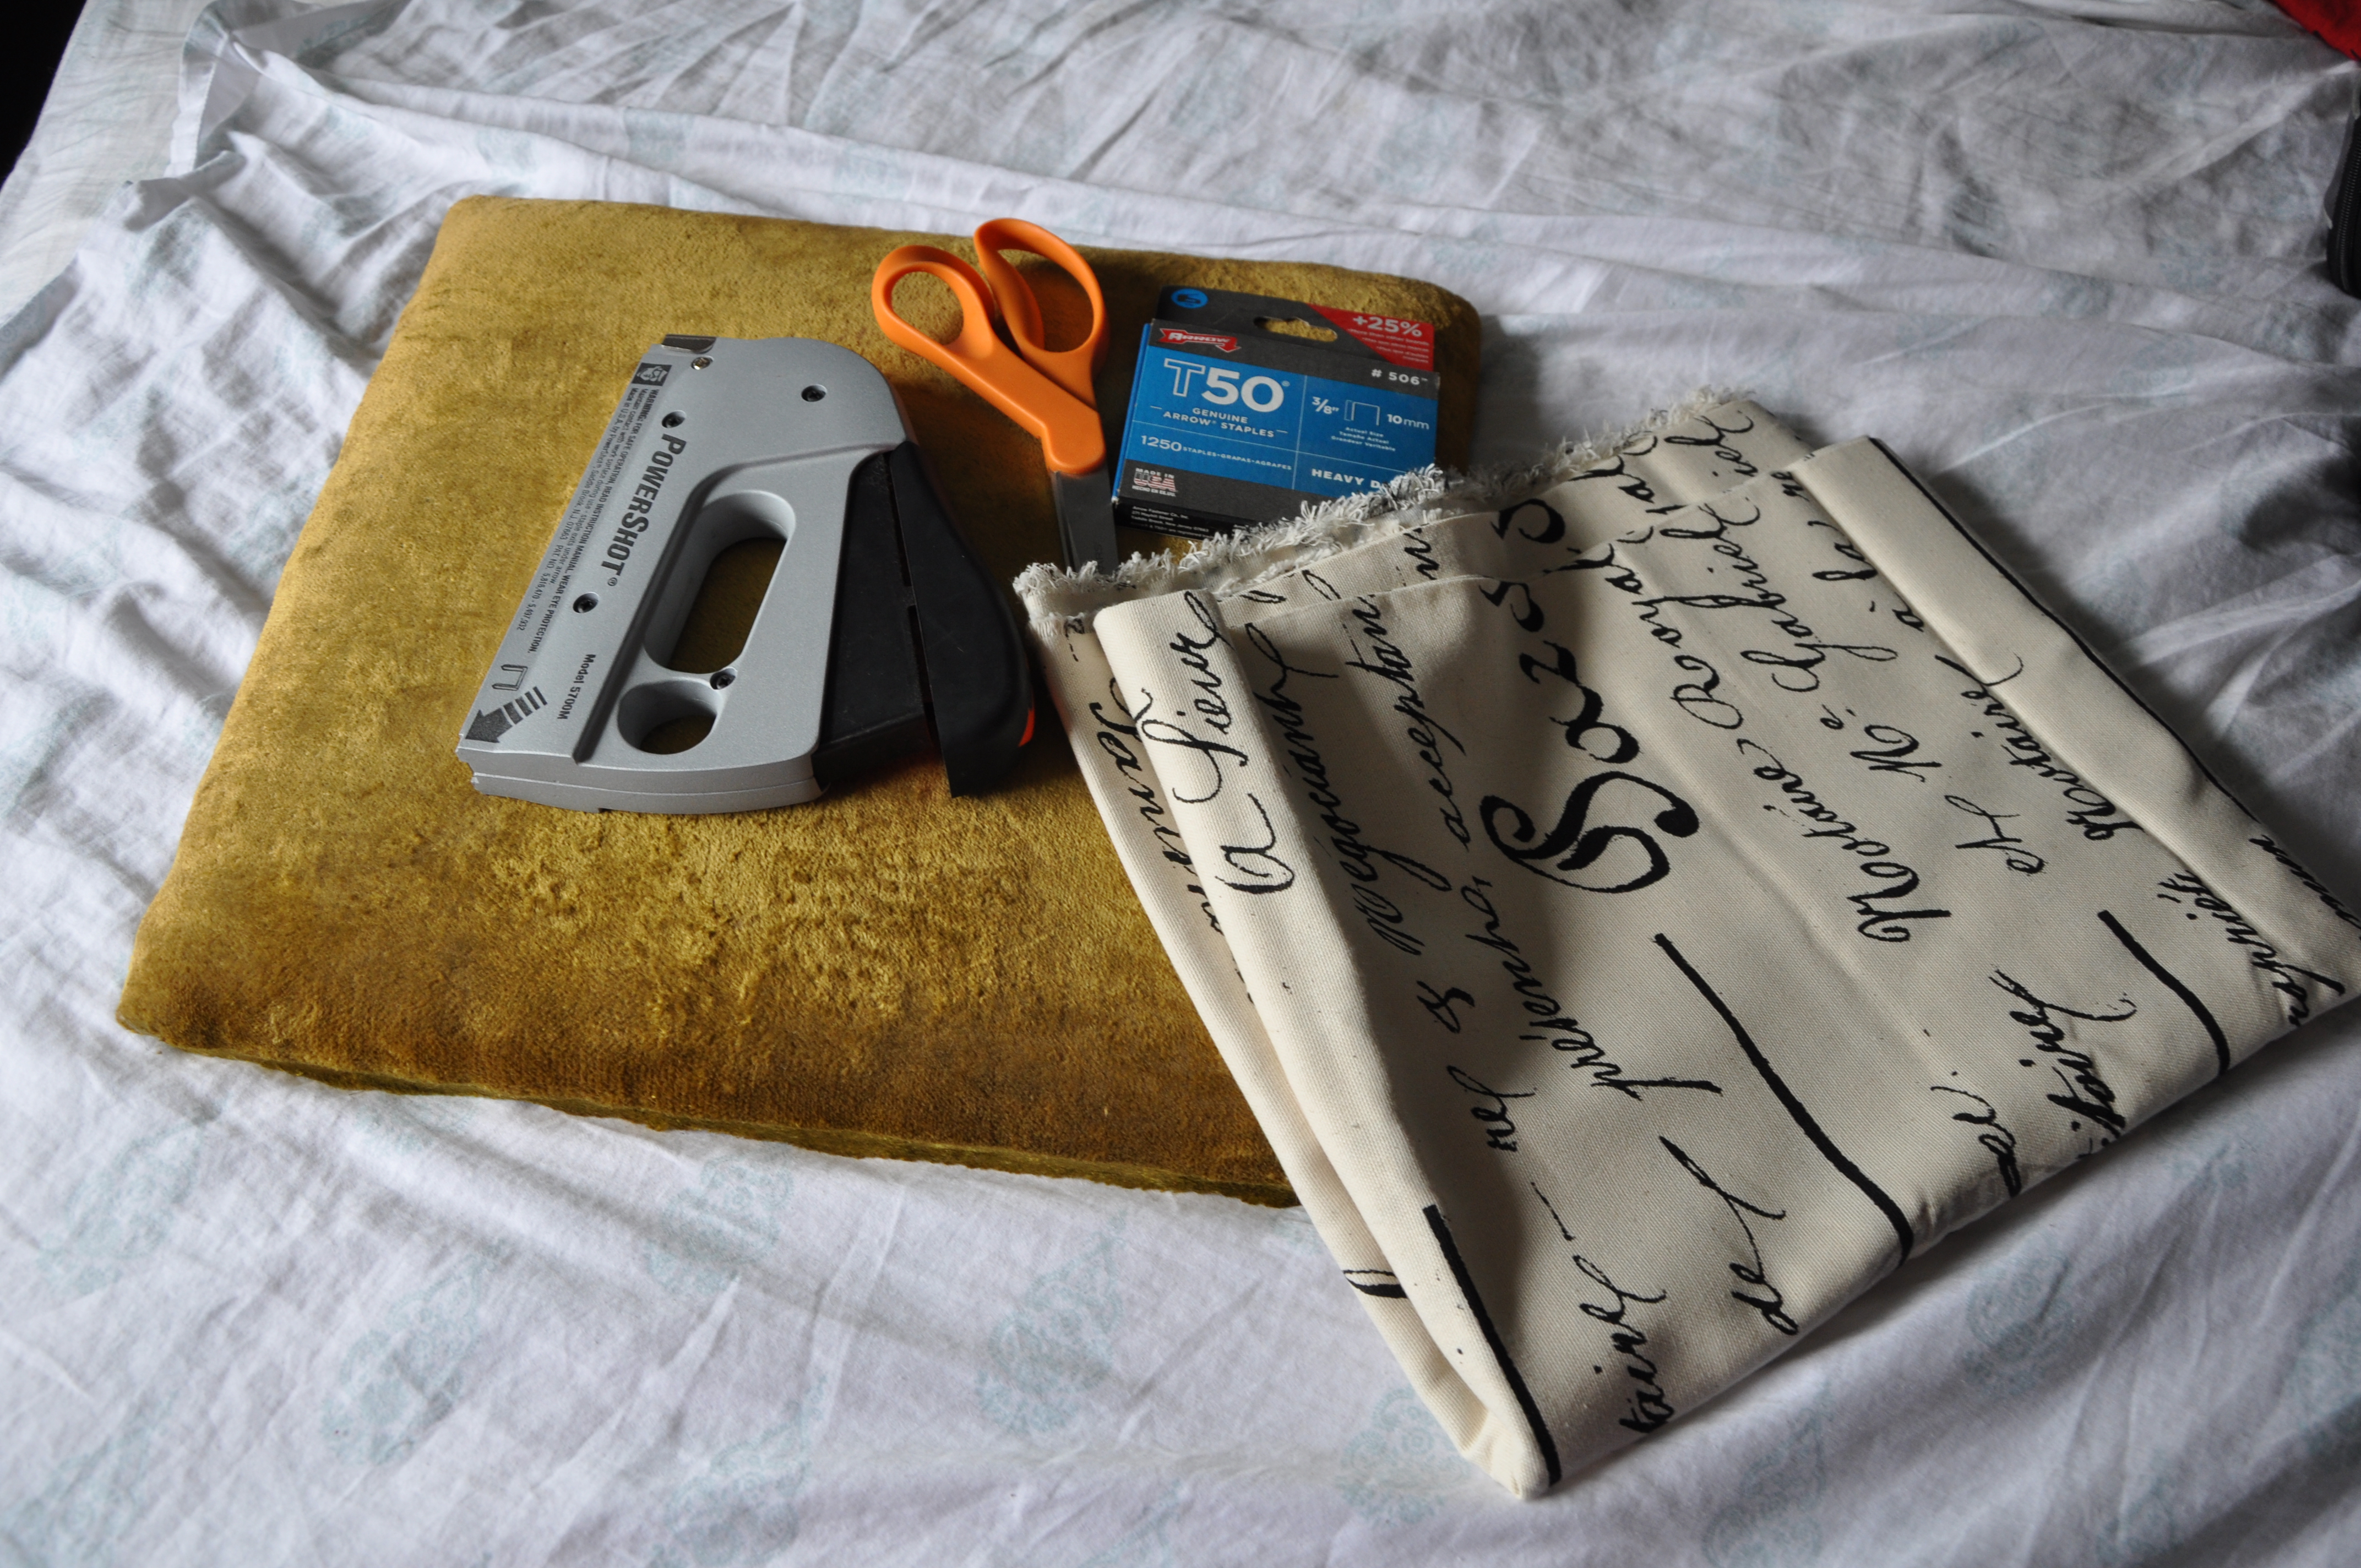
5. Recover the seat. Now this is where I lose a lot of people. This part seems scary. I swear to you its not! The hardest part is finding a fabric you like at Hobby Lobby. Not kidding. I will stand there all day…no thats too red…no too yellow…too bright…too trendy….too classic…too loud..too boring. Now…I have a hard time making up my mind…but you should see my sister Jess. OMG. She AGONIZES over each fabric choice. Its actually pretty funny…in part cause I do the same. I think they might hate her at Hobby Lobby..but then again…how do you tell they hate you?Cause they act like they hate everyone. Again. I digress.
All you need is your fabric. Something to cut with. Staples and a good heavy duty staple gun. Here’s the thing..you all know how cheap I am..but my husband has taught me the wonder that is good tools. Now me, left to my own devises wouldn’t have a screw driver to take things apart and would use a butter knife (I’m looking at you again Jess). I would buy the $6 staple gun and spend hours cursing the gun and hitting half bent staples with the end of the butter knife. My lovely husband has taught me the error of my ways on this one. SO I gritted my teeth and bought the easy to use, won’t hurt your hand, actually works the way you need it to, $20 stapler. Never regretted that one. Its one of my favorite things!
Here’s some pics that will help. You know..the whole picture, thousand words thing.
I cut out the fabric..leaving extra…just in case!
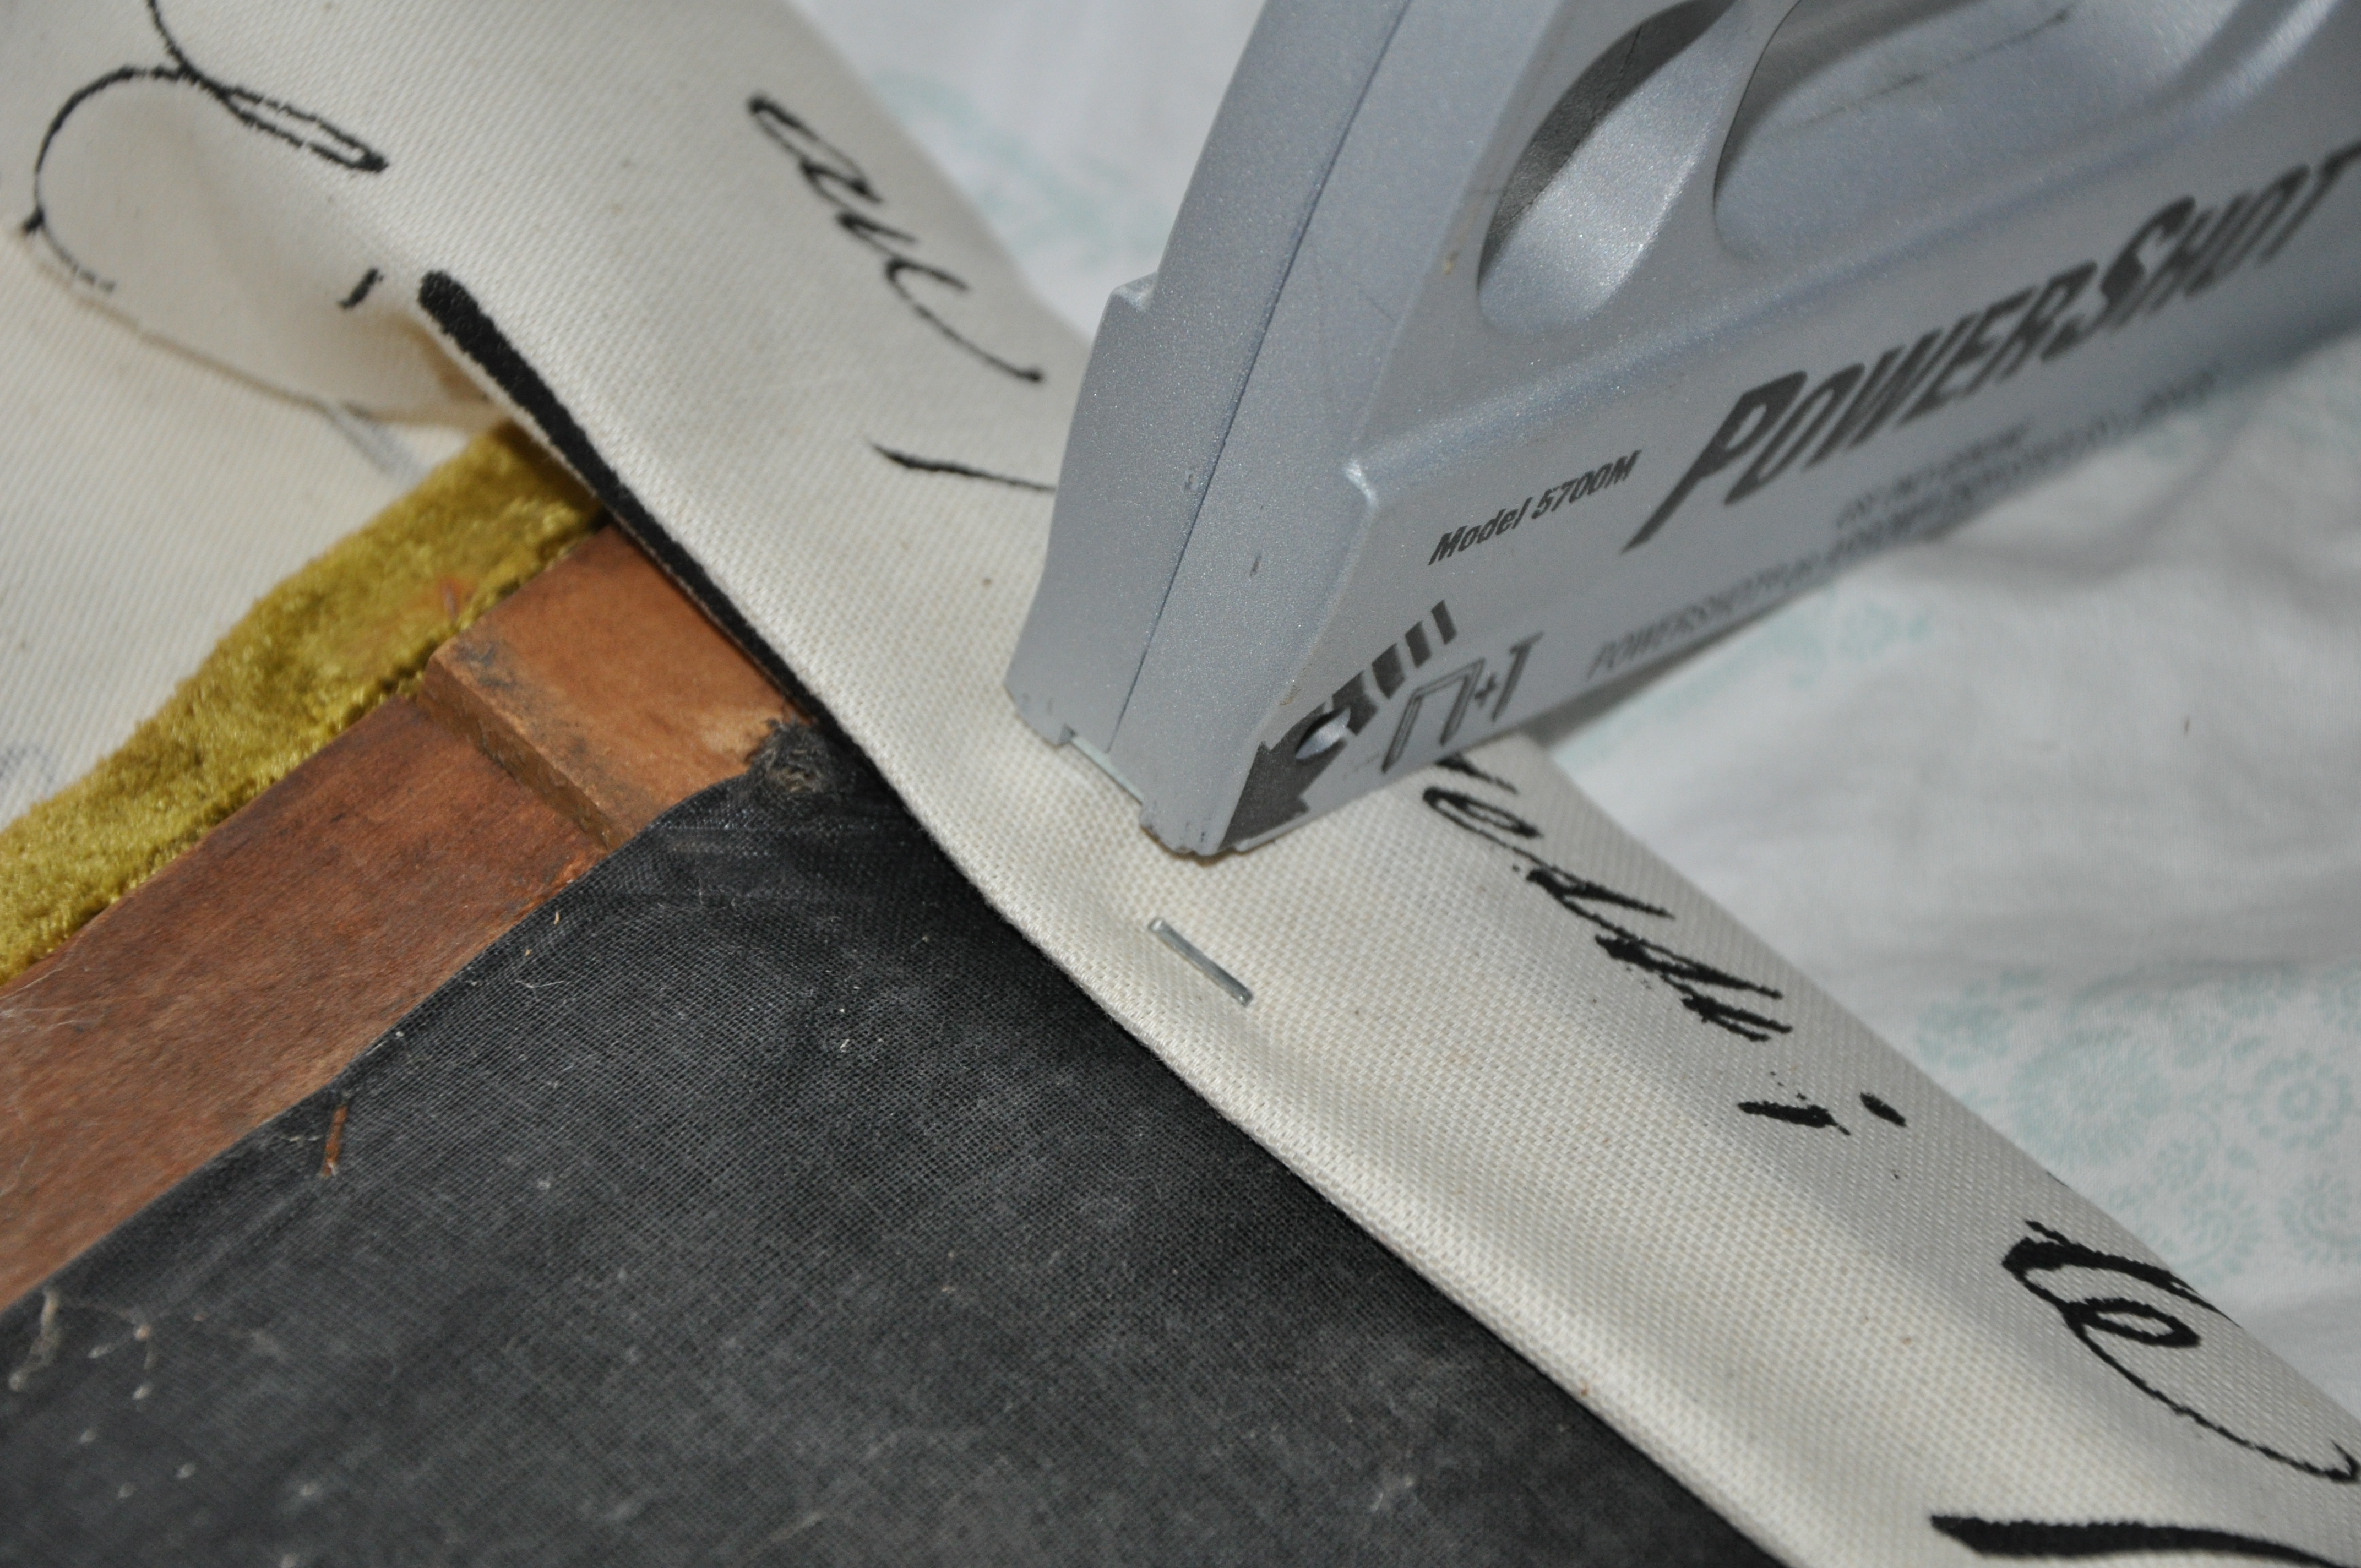
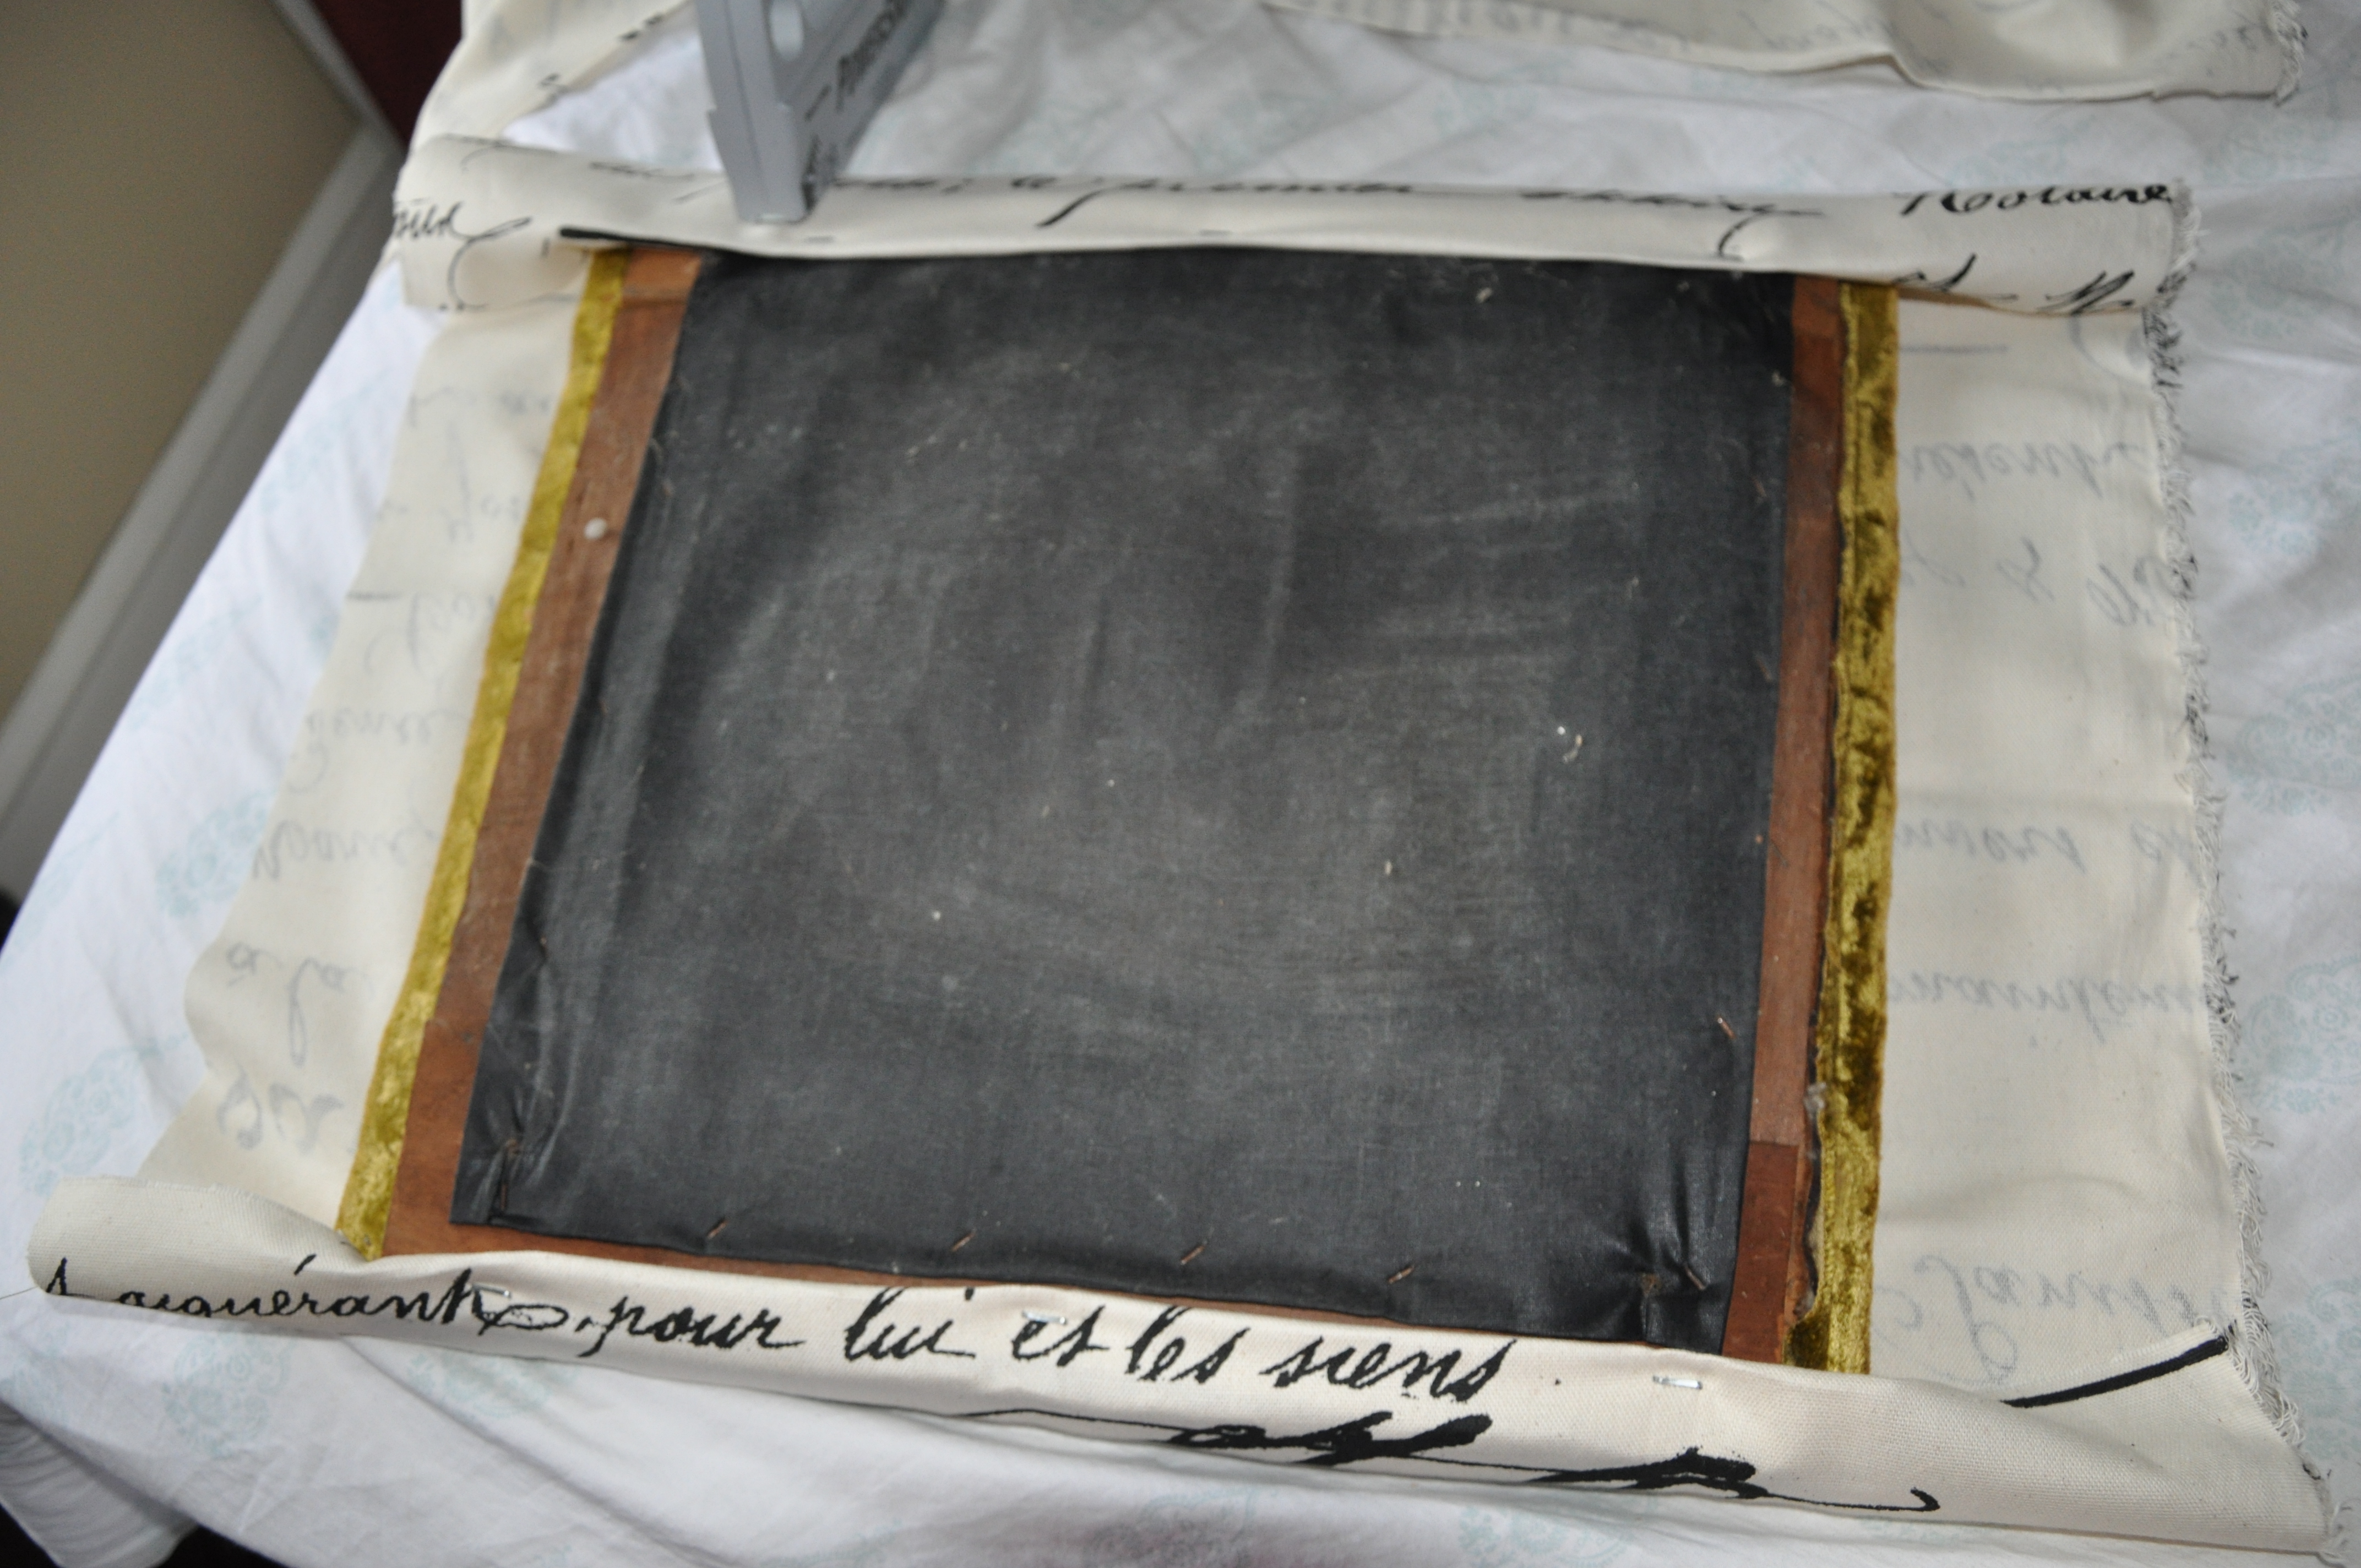
Folding fabric onto wood frame of seat..made sure you staple into the wood. Go slow. Take your sweet time! If you rush with a stapler you are likely to staple your own shirt to the chair ( I don’t want to talk about it).
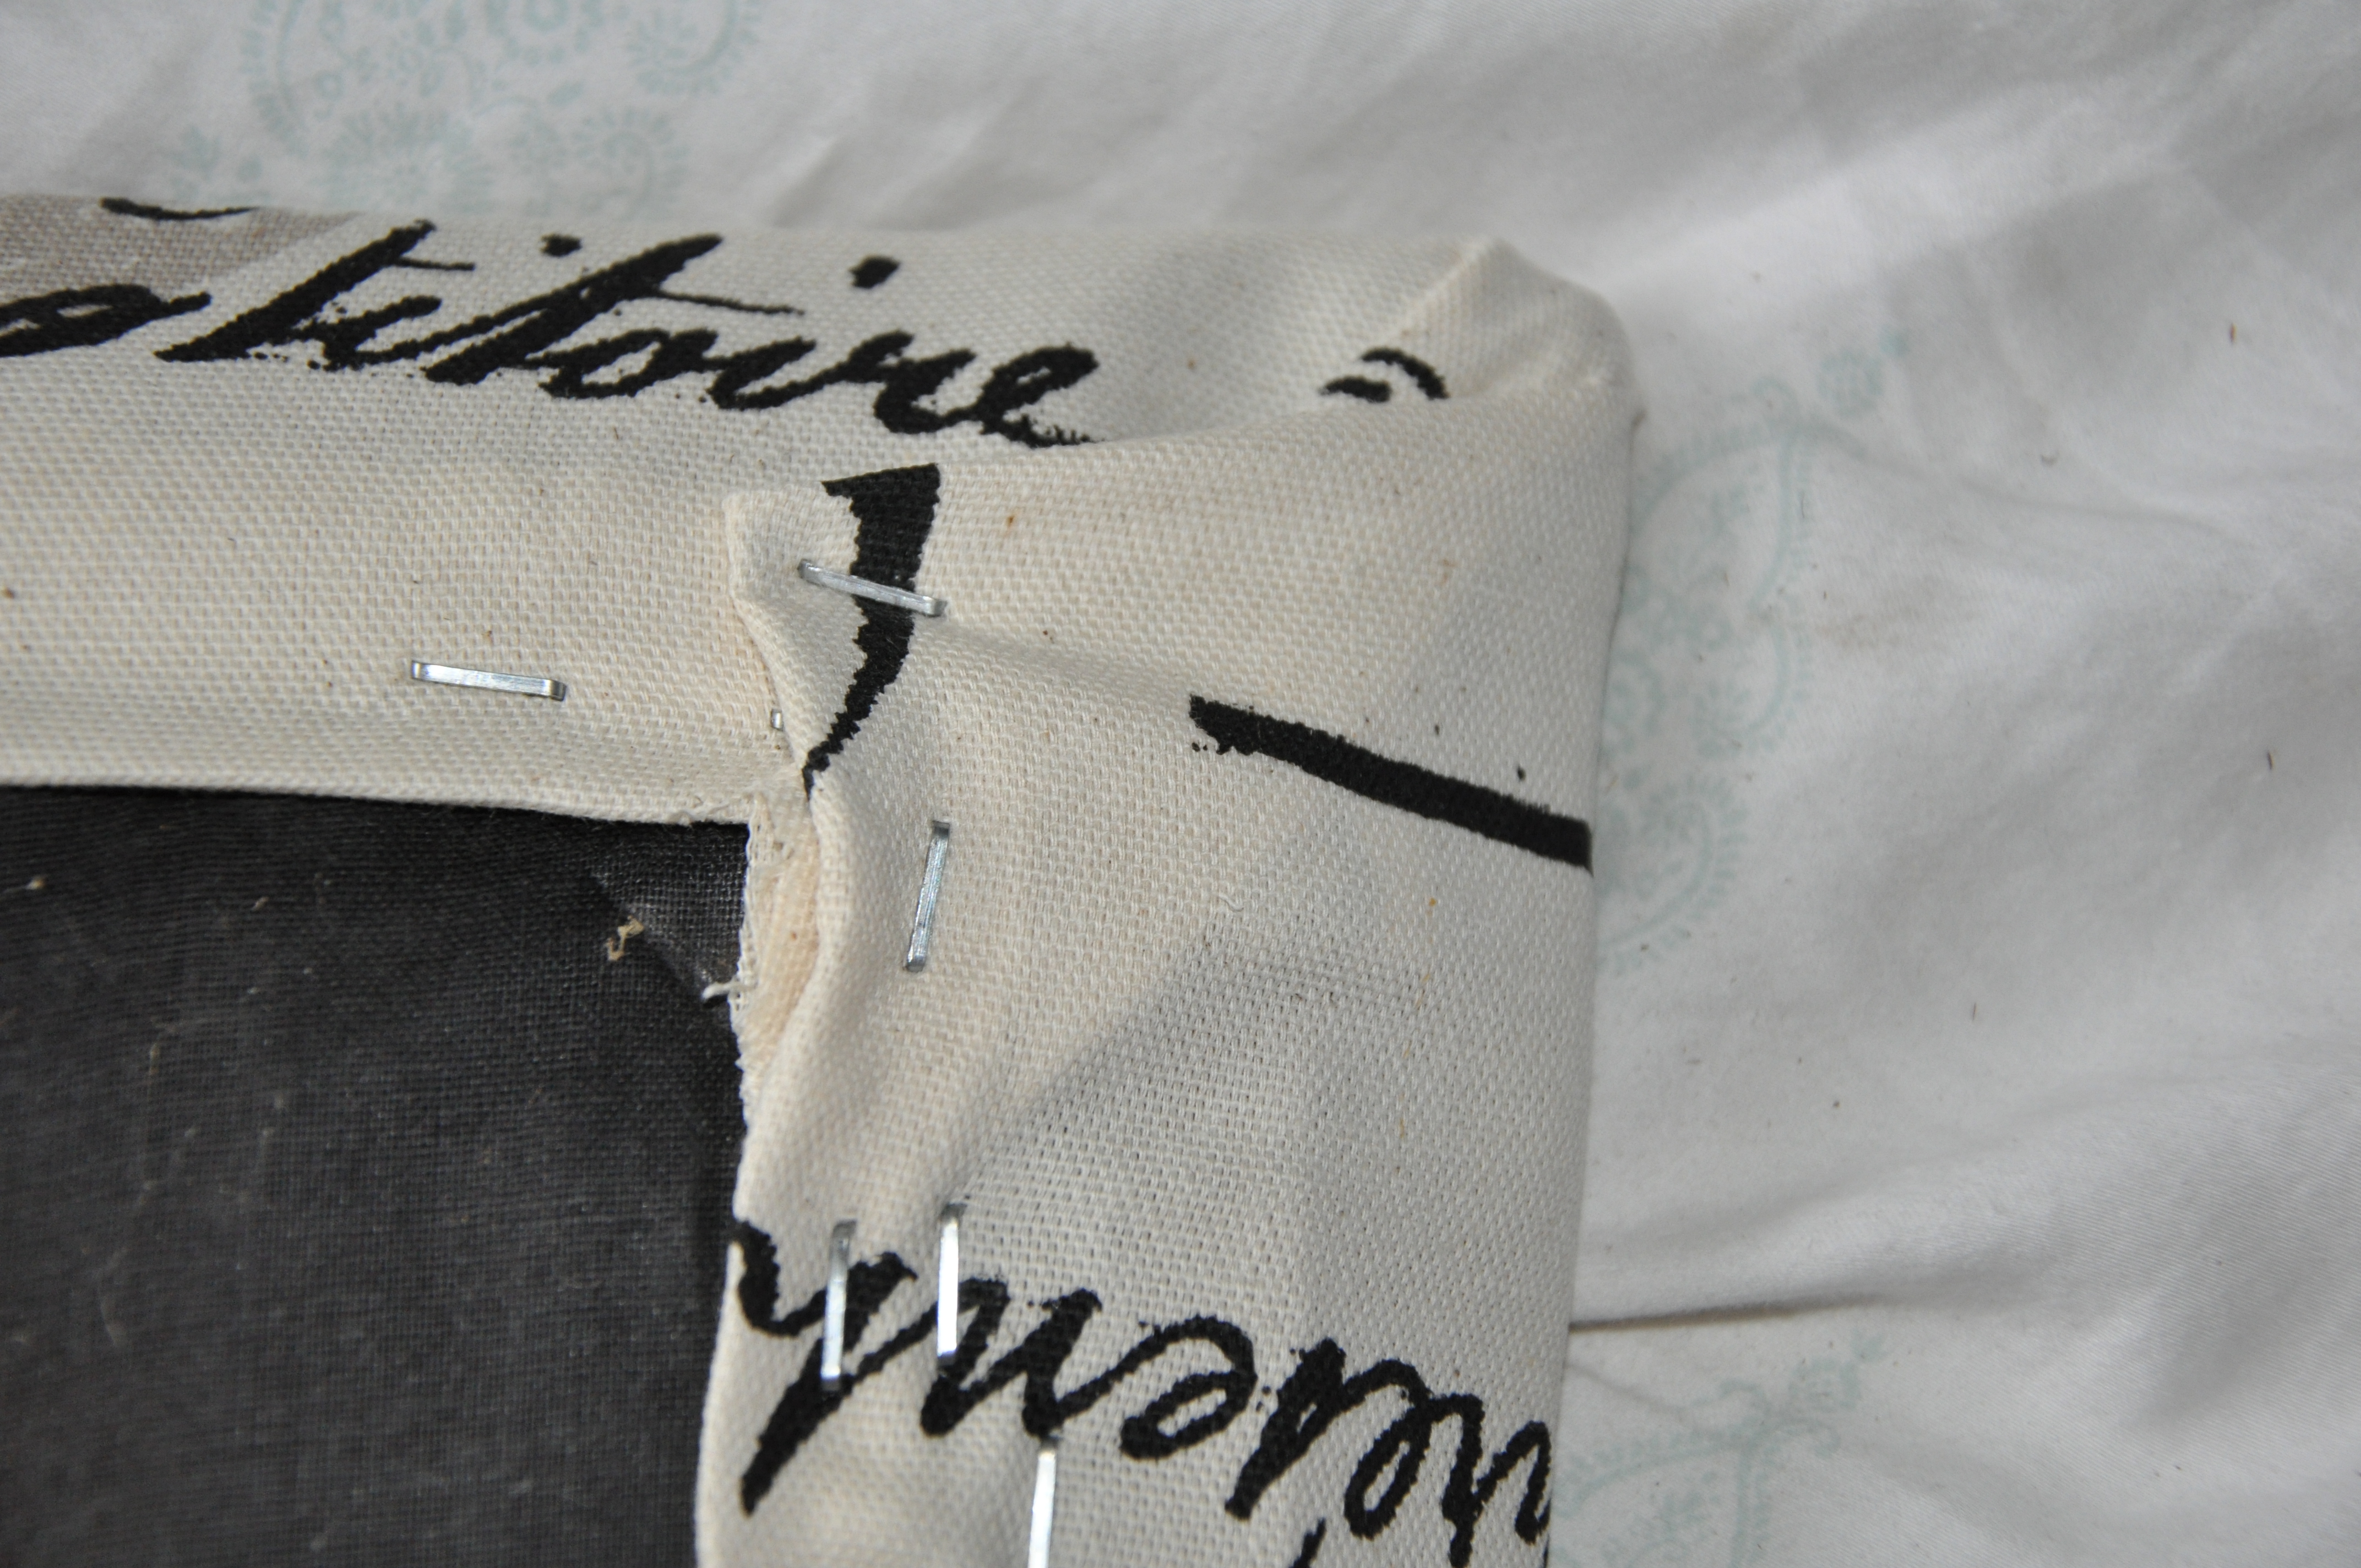
Sample of a corner…like a present! But with staples.
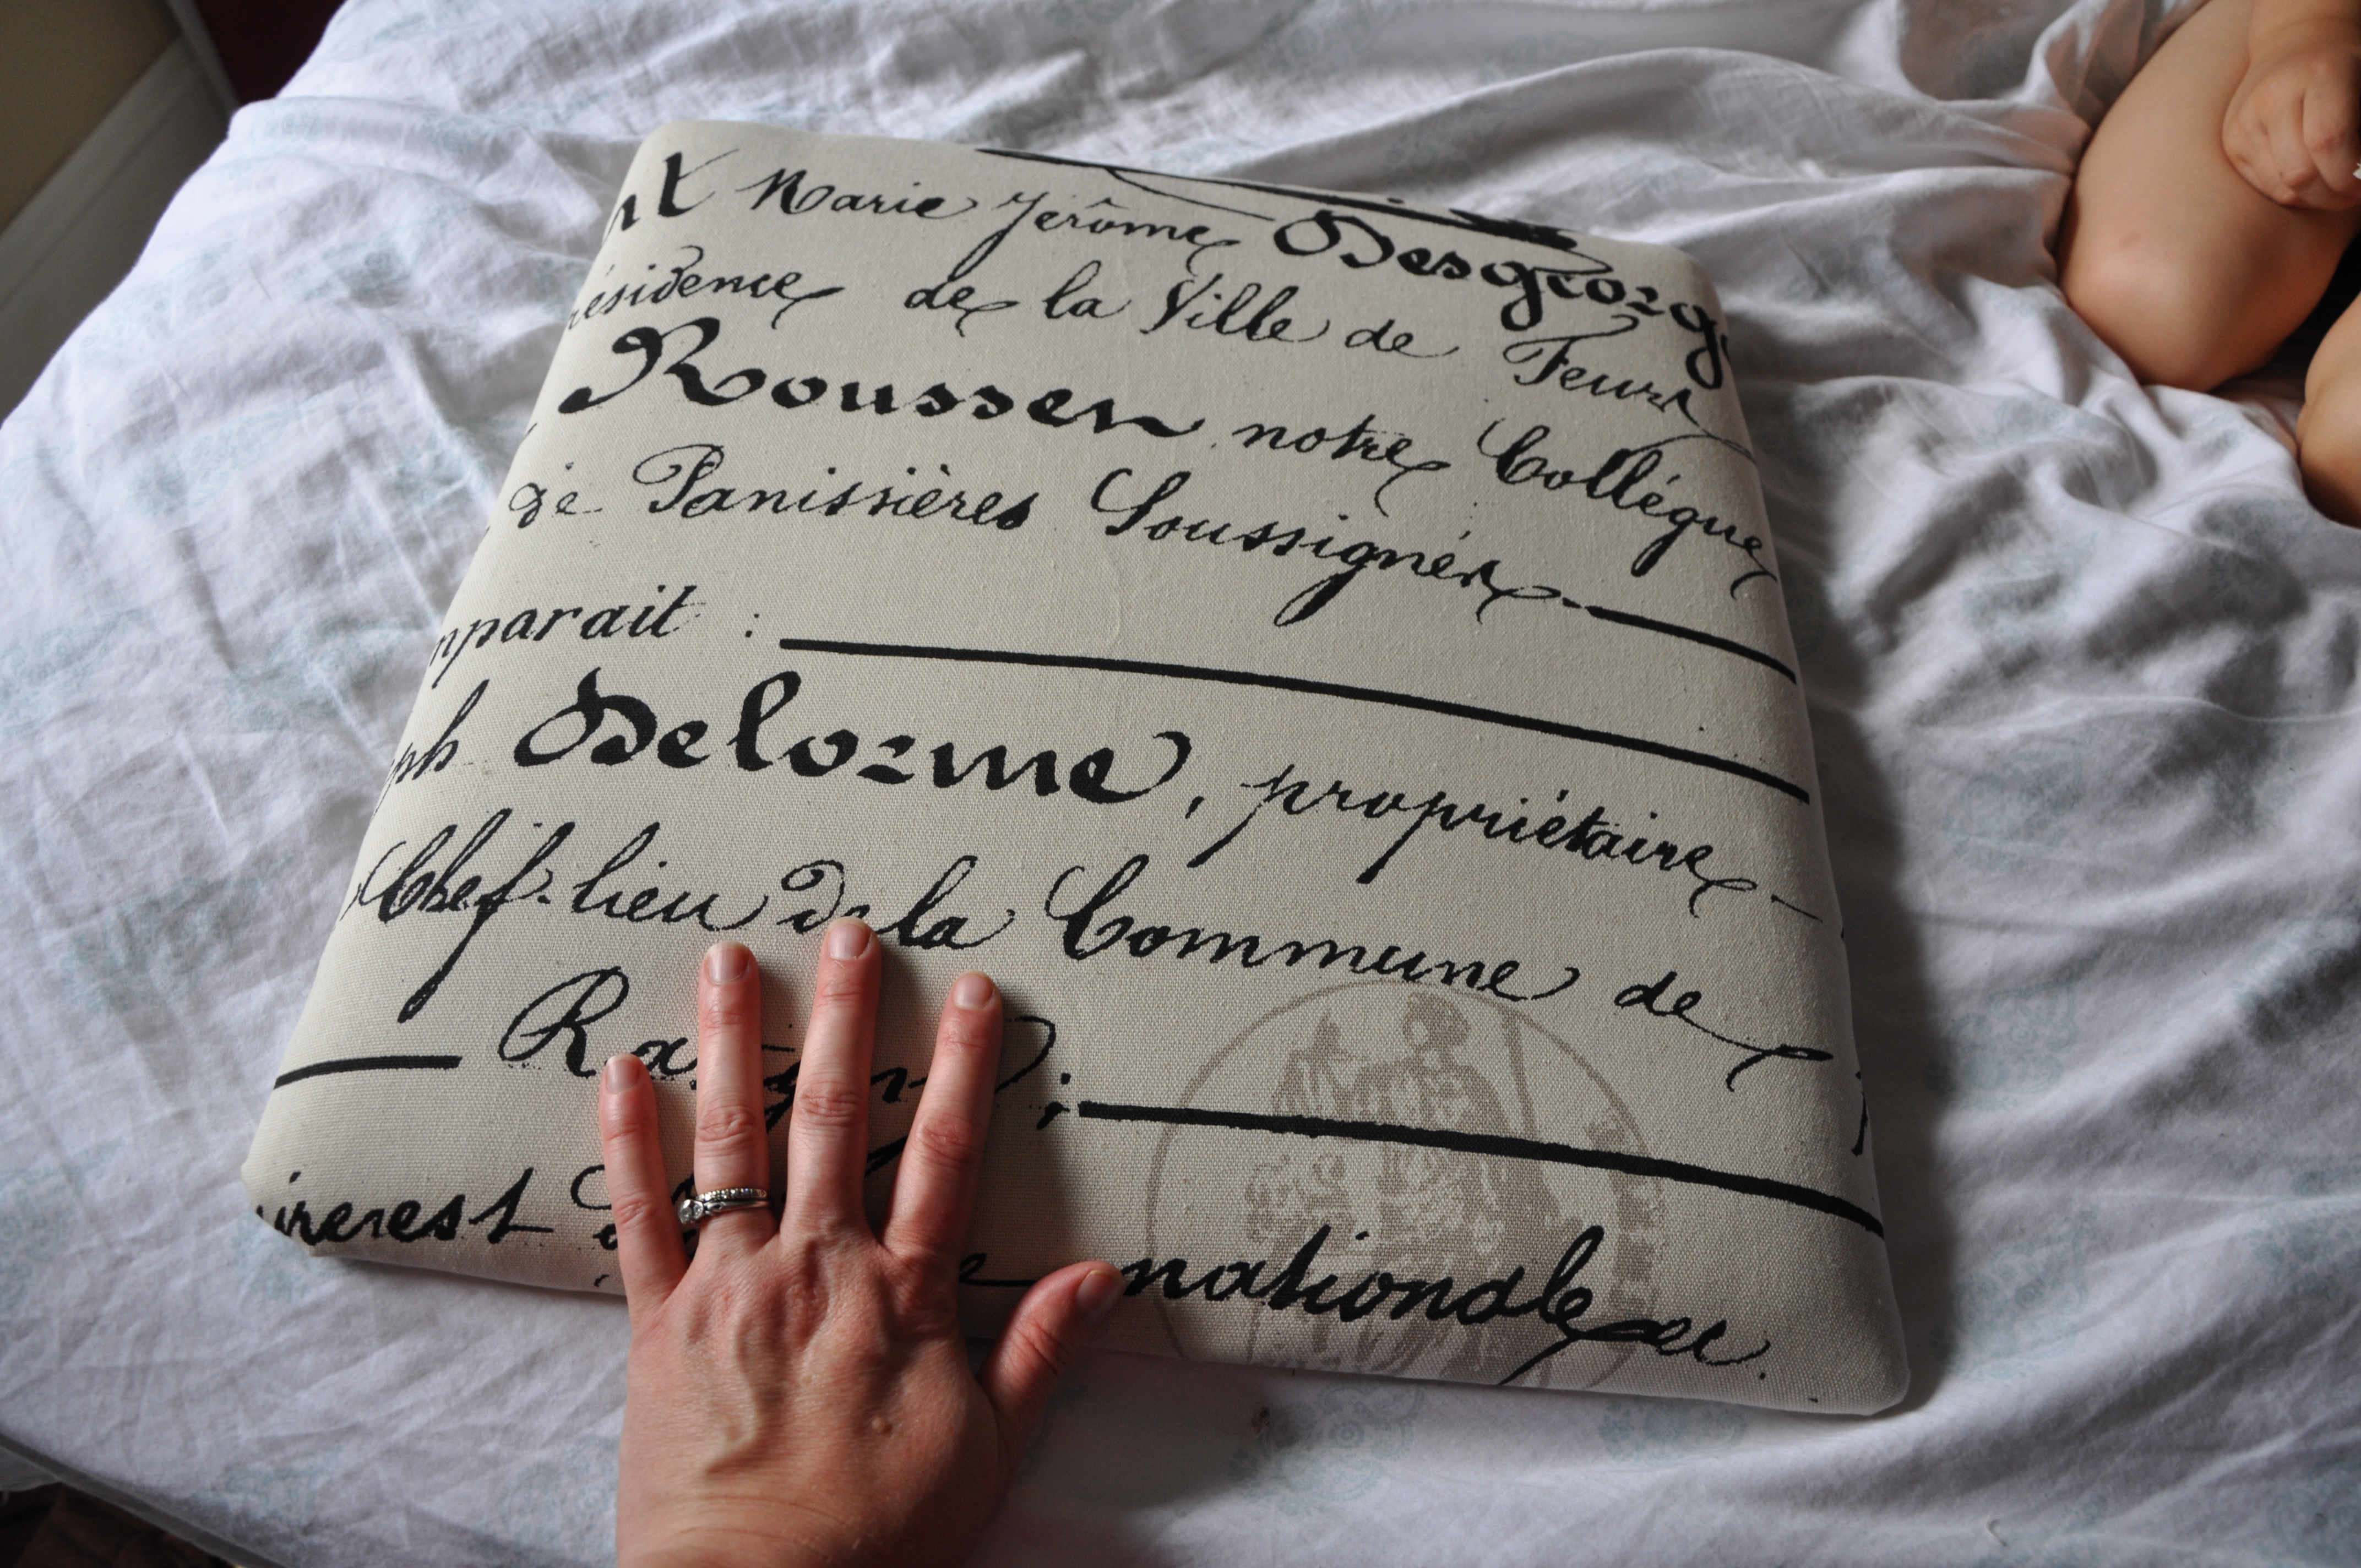
Done! So Frenchie right?

My little guy gives it a thumbs up and that little goof has excellent taste.

So here is the worst pic in the world of me screwing the seat back onto the chair. Its really easy..you can do it with a screwdriver (or a butter knife…….if you absolutely have to)….but I am a tool girl. This cordless screwdriver is the best gift a girl ever got…that an a Dremel (don’t get me started on how much I love the Dremel tool).
So after this came a quick sanding for a wee bit of a distressed look.
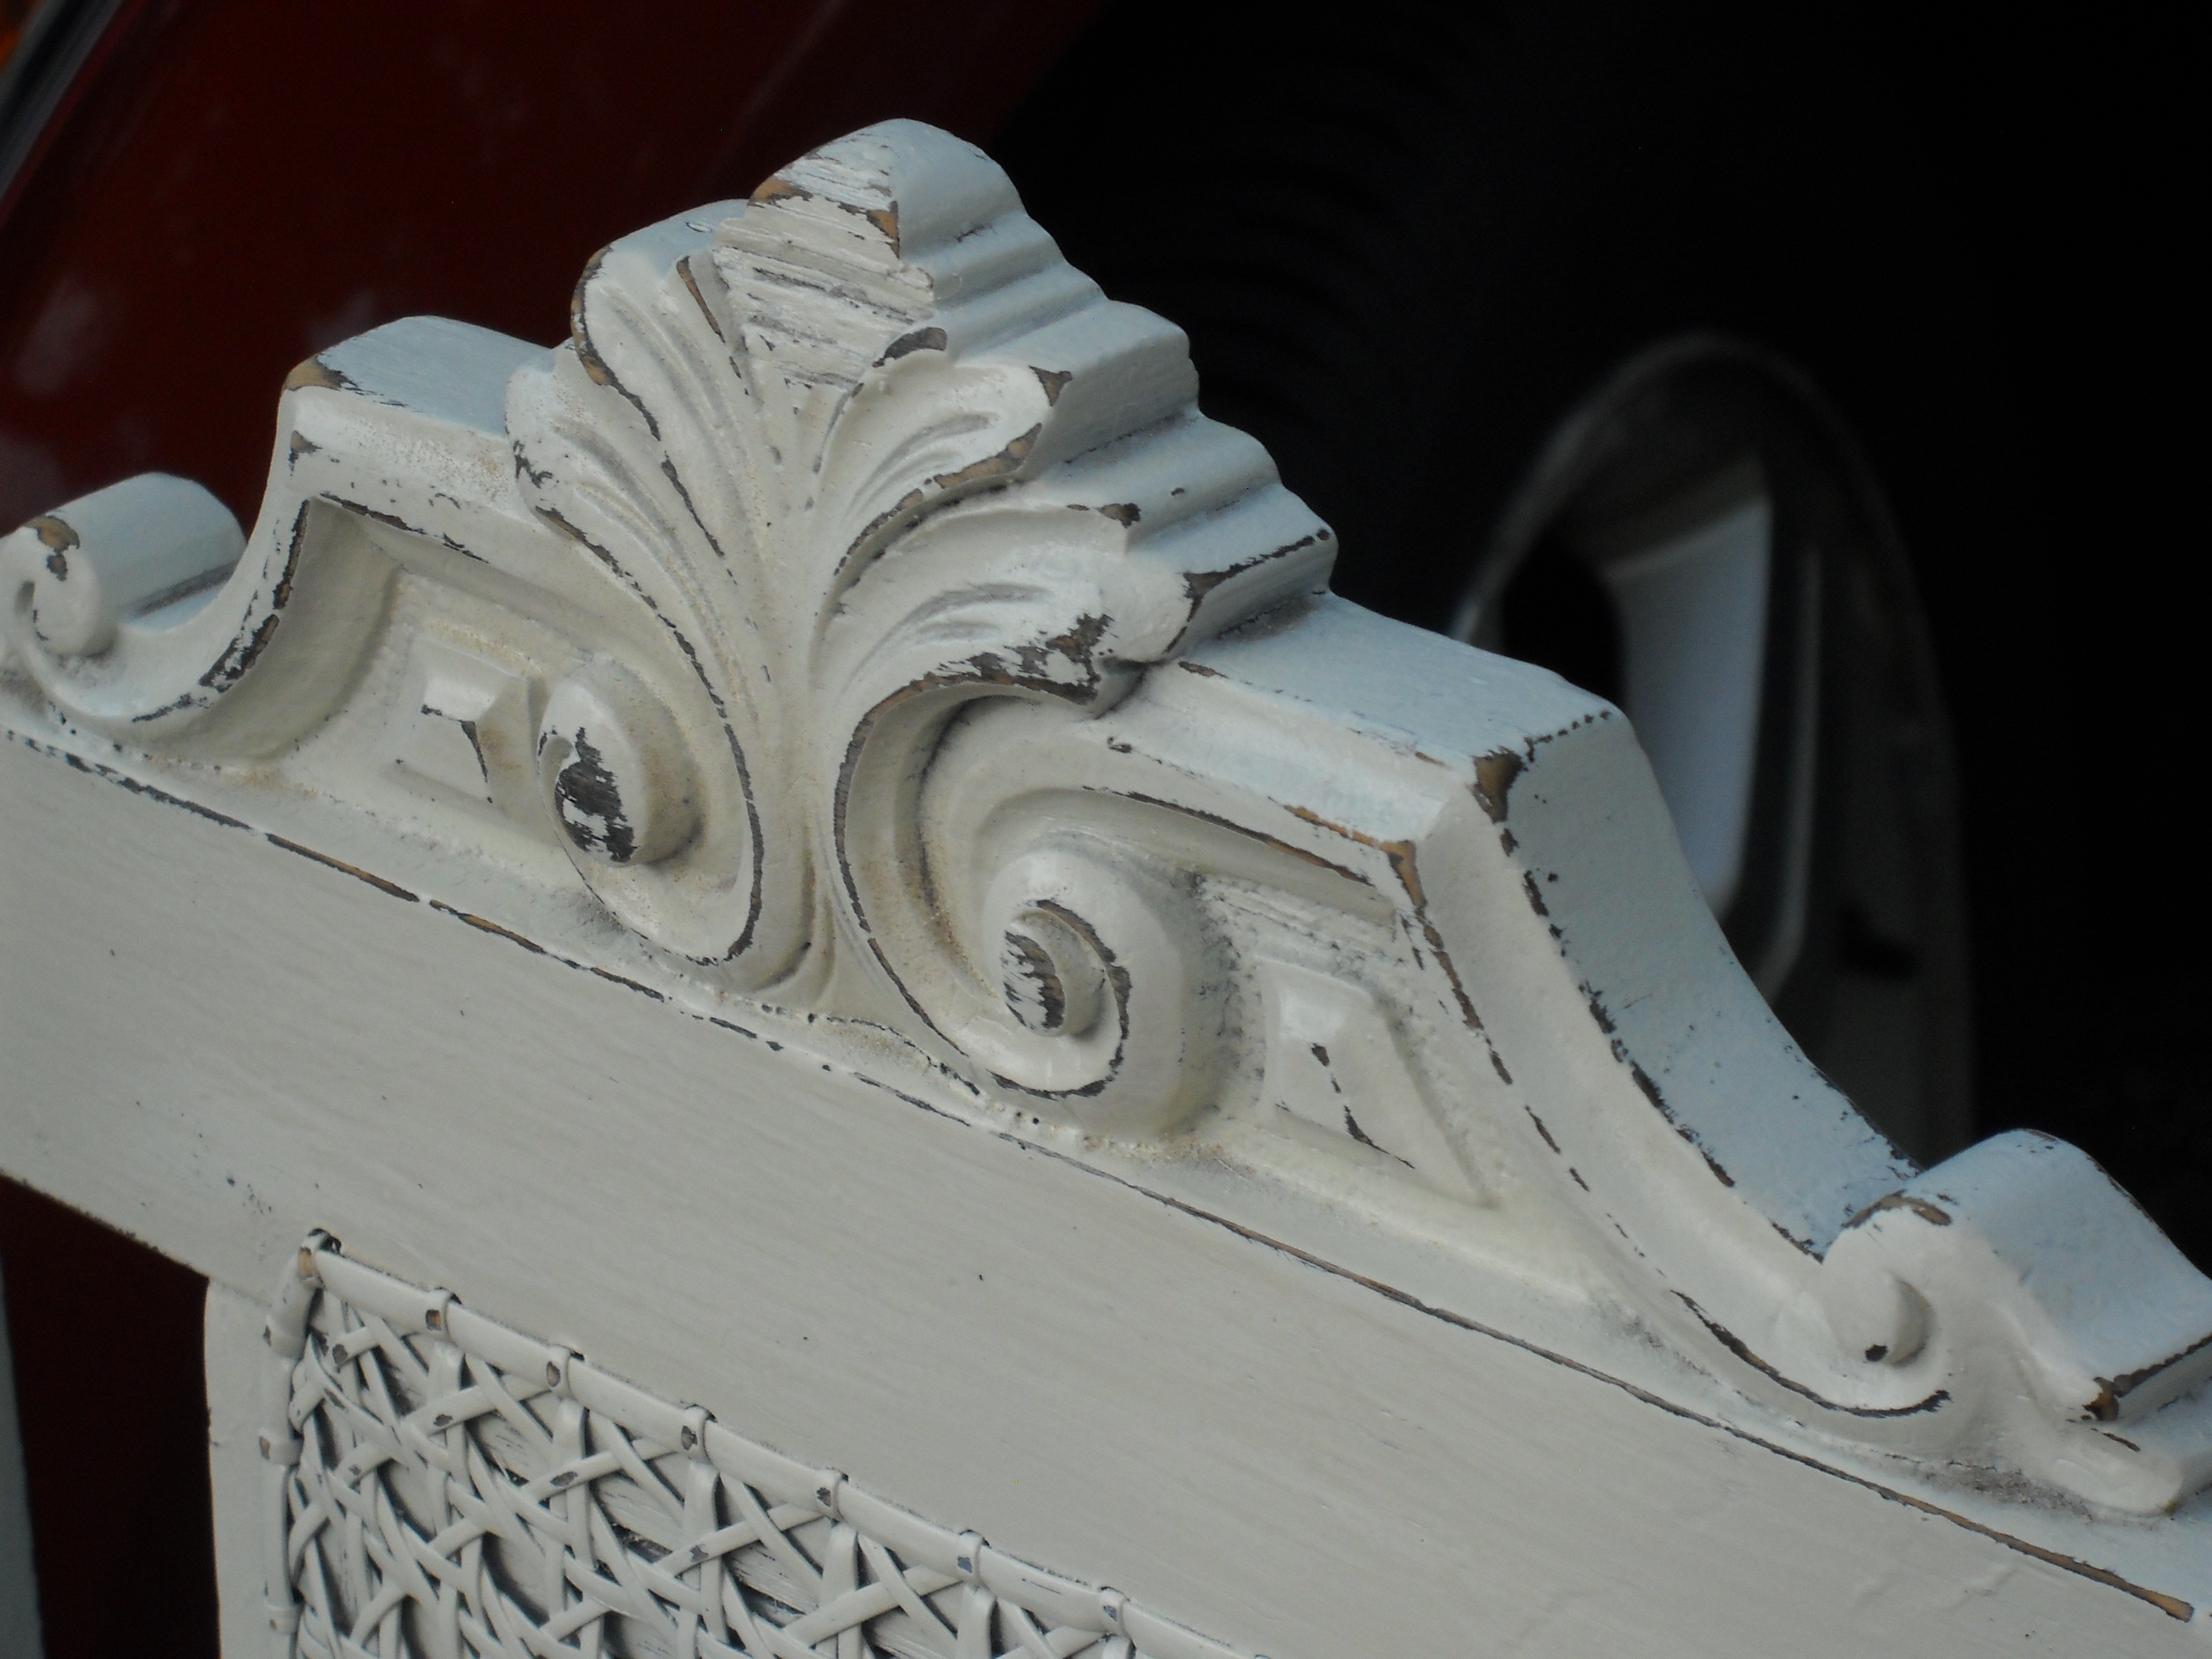
Aren’t the details pretty!?!?!
Last but not least…..Drum roll please………

There’s the lady! All dressed up and ready to go!
So you see?? That wasn’t so hard? These kind of chairs are a pleasure to redo. They always turn out great, its always a dramatic transformation and it doesn’t take months of work. Few hours and BAM. This sad little chair could have ended up at a landfill…instead she got a face lift, a seat lift and she’s ready to go! I hope you liked this project, as I plan of doing lots more and sharing it all with you guys. Let me know what you think! Your hopes, your dreams, your chairs.
Bye! Have a great day.

Love this! You chose a really great fabric for the seat!
Thanks! I love your cat! SO cute.